
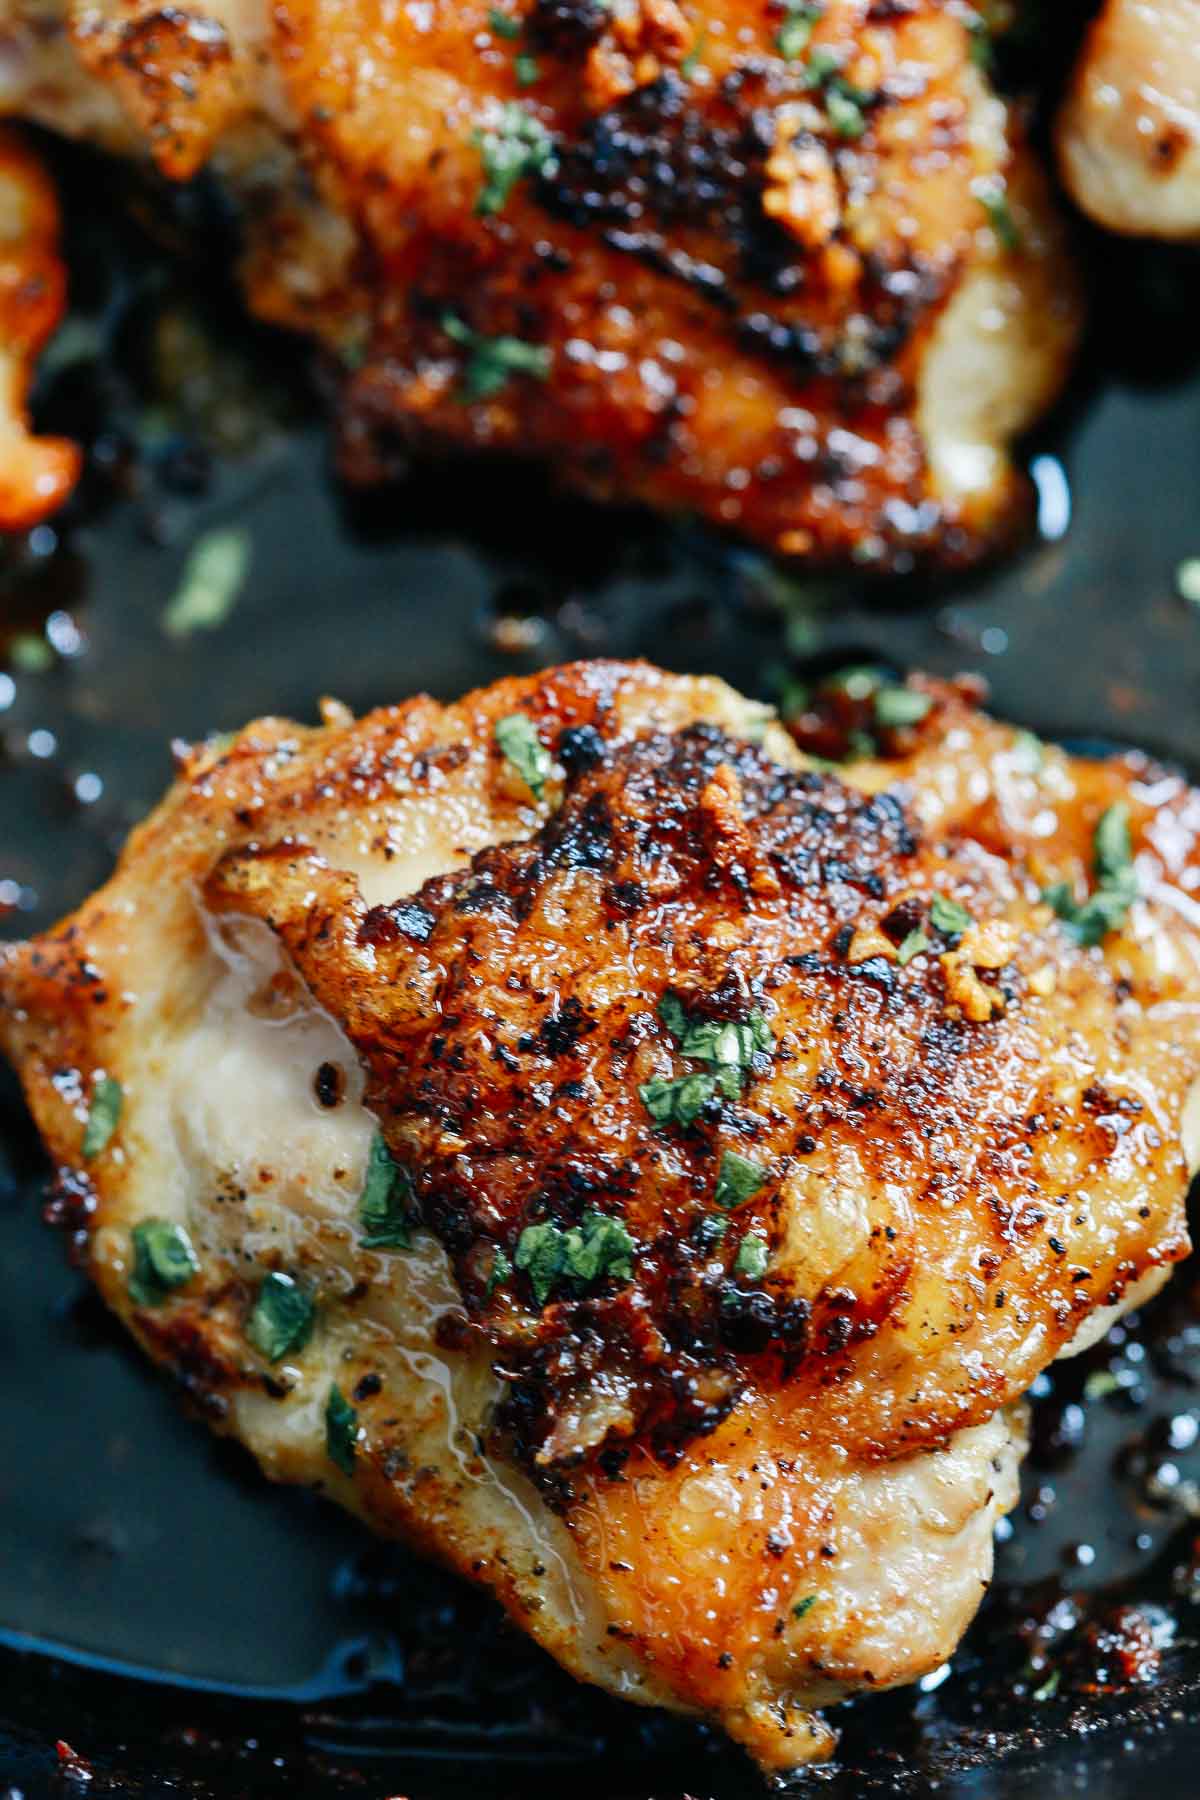
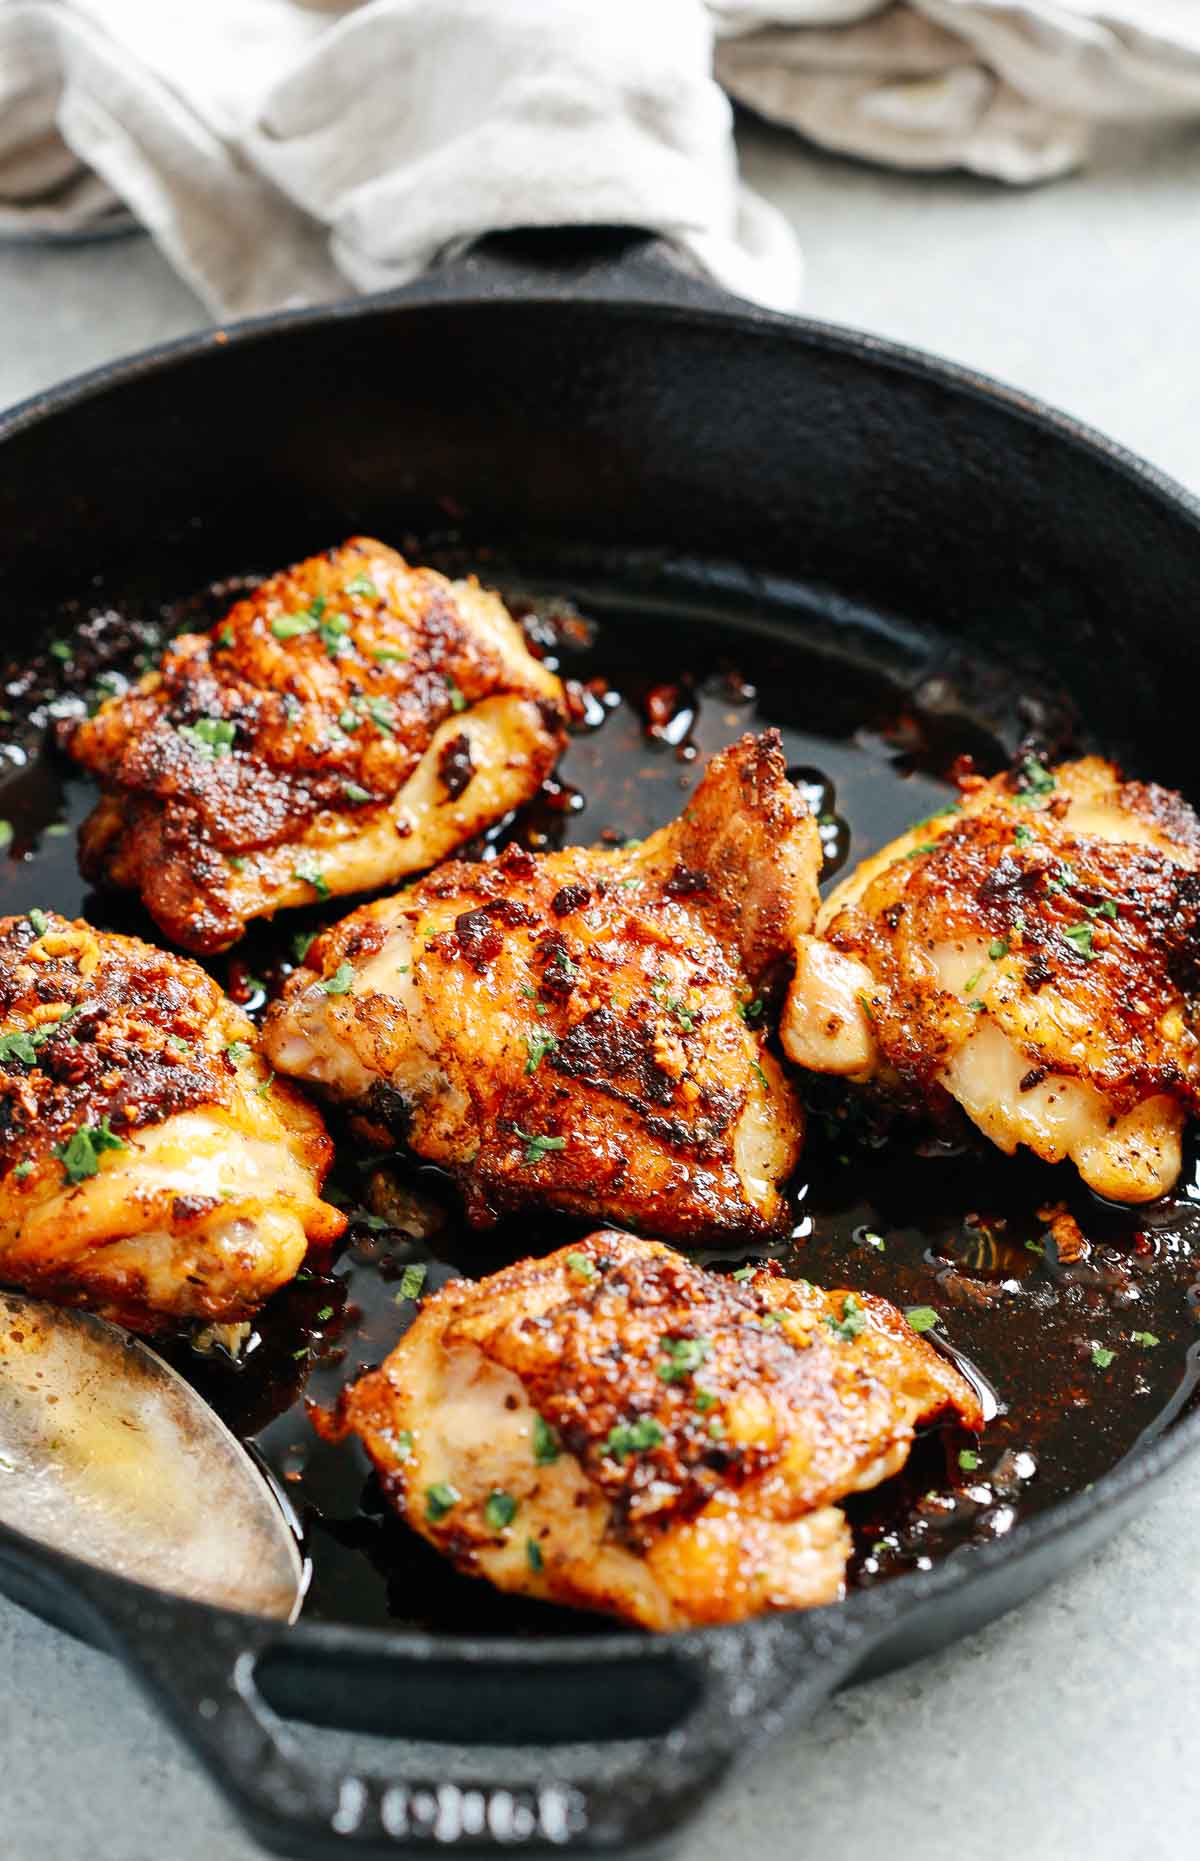
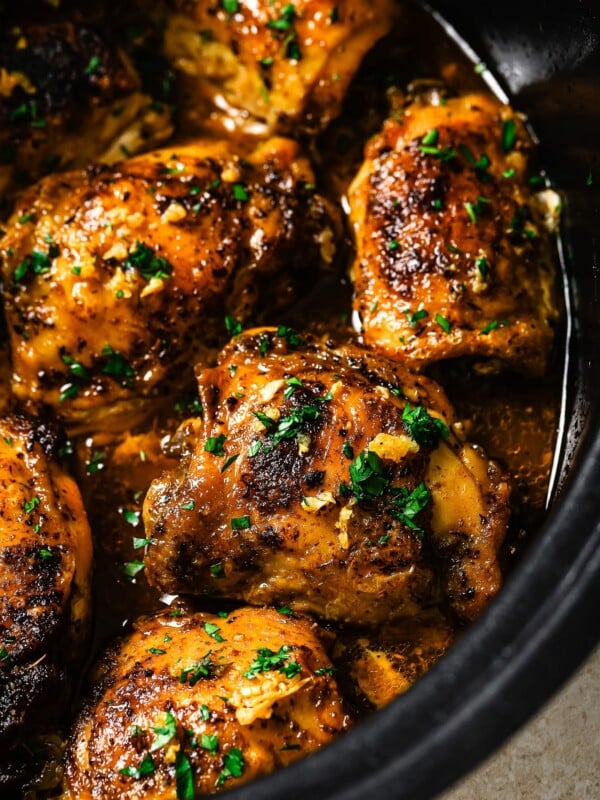
These baked chicken thighs have been a staple in my house for years and for good reason. Bone-in, skin-on thighs go into a cast iron skillet with garlic butter, then straight into the oven for 30 minutes. The result is incredibly crispy skin with juicy, tender meat underneath. You only need a handful of ingredients and 45 minutes to get dinner on the table.

The Chicken Thigh Recipe My Family Fights Over
I’ve been developing chicken recipes for busy families for over 10 years on Primavera Kitchen, and I can tell you with confidence that bone-in, skin-on chicken thighs are one of the most forgiving and flavourful cuts you can cook.
They stay juicy even if you leave them in the oven a few minutes longer, something you simply can’t say about chicken breast. I’ve made this garlic butter version more times than I can count, and it never fails.
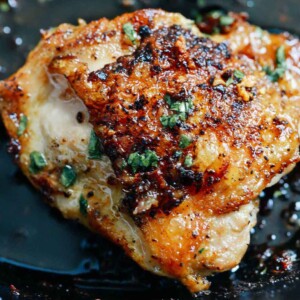
The key is the sear-then-bake method. I always start the chicken skin side down in a hot skillet before finishing it in the oven. This is what gives you that deeply golden, crispy skin that Pierre and Thomas absolutely fight over at the dinner table. The garlic butter sauce does the rest, keeping every single bite incredibly juicy and tender.
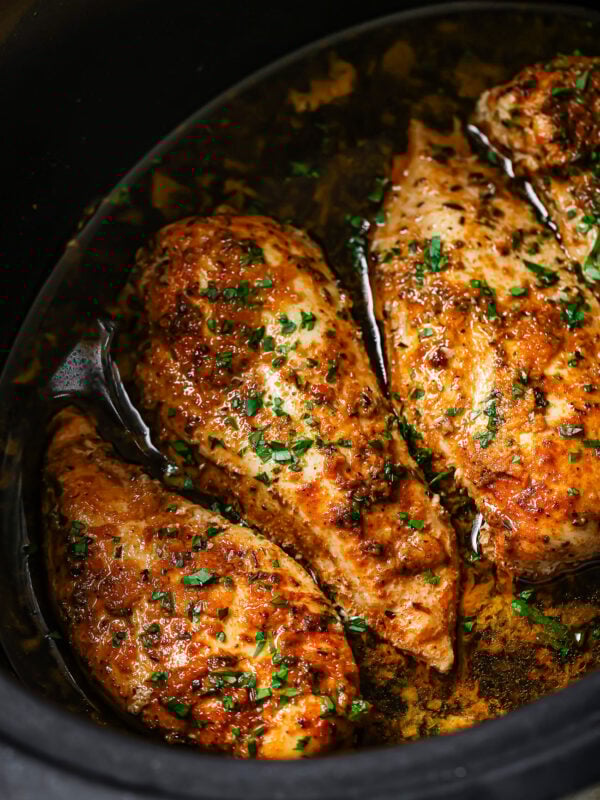
If you love cooking chicken thighs as much as I do, my Slow Cooker Chicken Thighs are just as easy and perfect for those days when you want dinner to cook itself. And if you’re more of a chicken breast person, my Garlic Butter Baked Chicken Breast uses the same flavour profile and is one of the most popular recipes on Primavera Kitchen.
For sides, I always serve this with my Creamy Mashed Potatoes cause they soak up that garlic butter sauce perfectly and my Parmesan Green Beans to round out the plate.
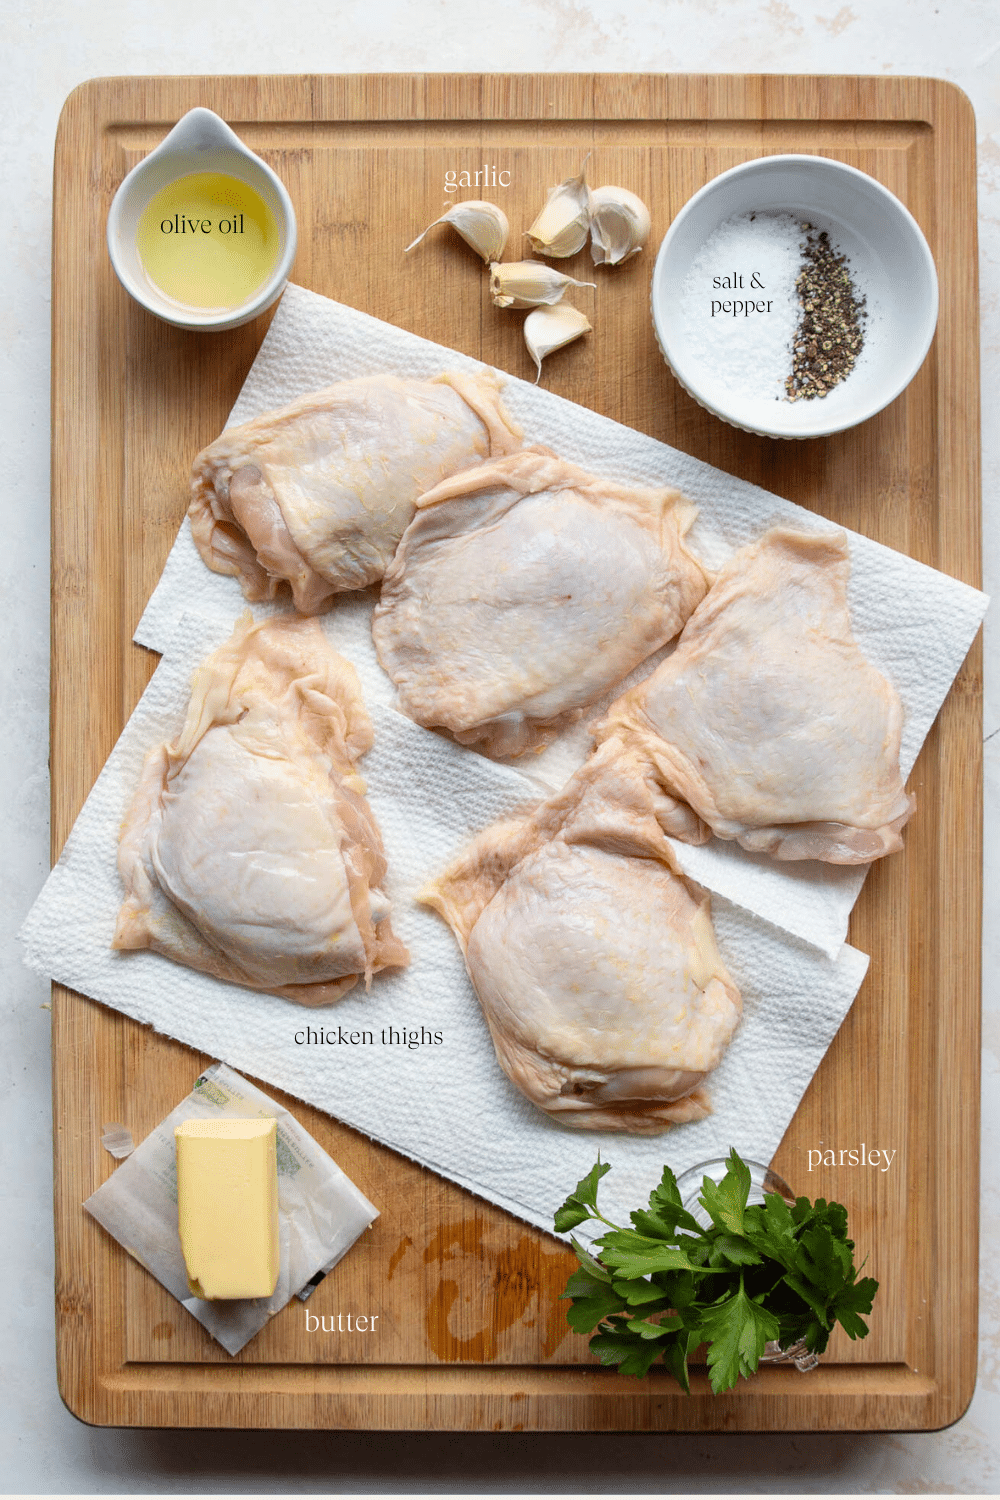
Chicken Thighs – I use bone-in, skin-on chicken thighs to get a crispy outside while keeping the inside moist and tender. Of course, if you only have boneless skinless chicken thighs or chicken breasts, you can use those too. Just remember to reduce the baking time to 20–25 minutes. However, after making this recipe many times, I’ve found that keeping the skin and bone in makes the chicken much juicier and more flavorful.
Garlic – I like to use freshly crushed cloves because they have a stronger, more vibrant flavor and aroma compared to store-bought pre-minced garlic. Store-bought garlic usually comes as a paste or finely minced, which means it burns much faster in the pan and can turn bitter before the chicken is done.
Butter – I prefer unsalted butter because it lets me control the salt level and lets the natural flavors of the other ingredients shine.
Olive Oil – I use a small amount of olive oil to sear the chicken before baking. It helps the skin get golden and crispy without burning.
Salt and Black Pepper – Simple seasoning makes a big difference here. I season both sides of the chicken thighs generously before they hit the pan — it’s the foundation of all the flavor.
How to Make Baked Chicken Thighs
1. Season the chicken: Preheat your oven to 400°F and move the rack to the center. Now, before you do anything else, pat your chicken thighs completely dry with paper towels. I know it sounds like a small thing, but trust me on this one! Any moisture left on the skin will turn into steam in the oven and you’ll end up with soft, pale skin instead of that gorgeous golden crispy skin we’re going for. Once they’re dry, season both sides generously with salt and black pepper. Don’t be shy with the seasoning! This is where all the flavor starts!
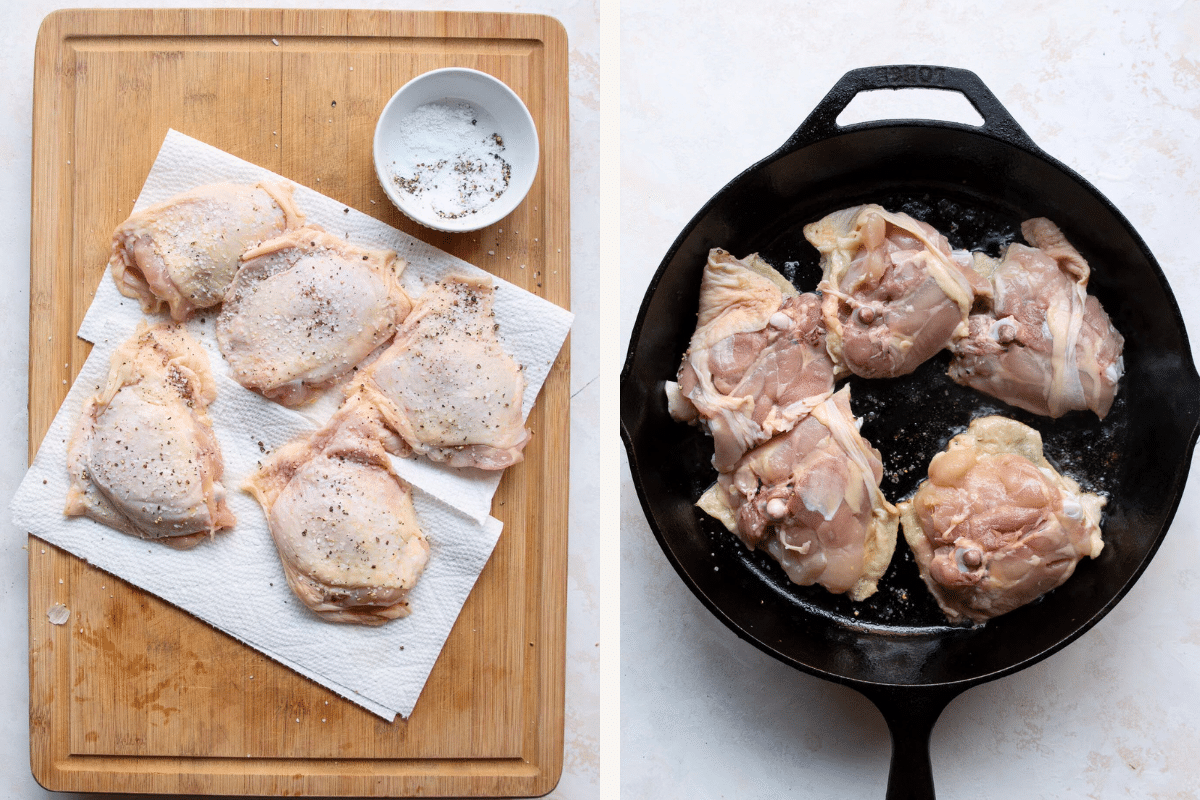
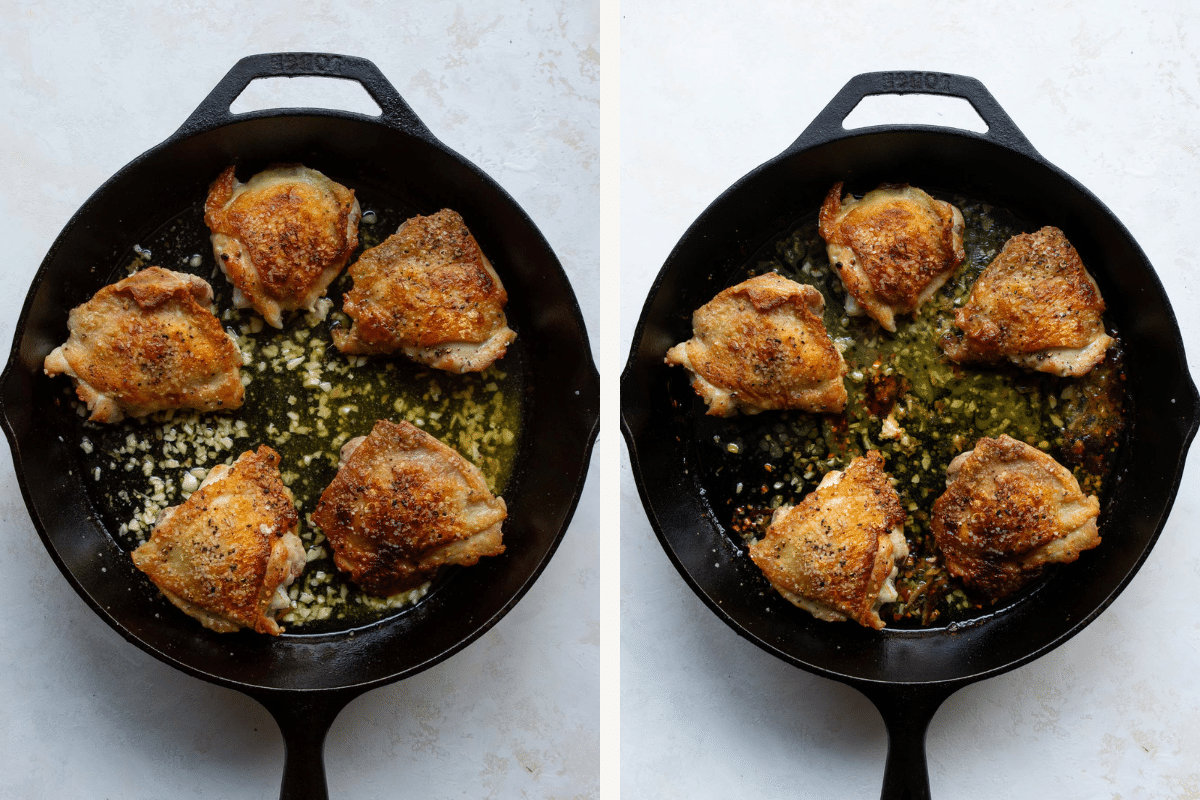
2. Sear the skin: Heat your olive oil in a 10-inch cast iron skillet over medium-high heat. Place the chicken thighs skin-side down and leave them alone for about 5 minutes, no moving them around! My cast iron skillet is my best friend for this because it goes straight from the stovetop to the oven, which means less mess. Once golden, flip the thighs over, push them to one side, melt the butter, add the crushed garlic and stir for 30 seconds. Keep the heat at medium here, fresh garlic burns fast and turns bitter!
No cast iron skillet? No worries! Sear in any regular skillet, then transfer to a baking dish to finish in the oven and pour the garlic butter sauce over the top.
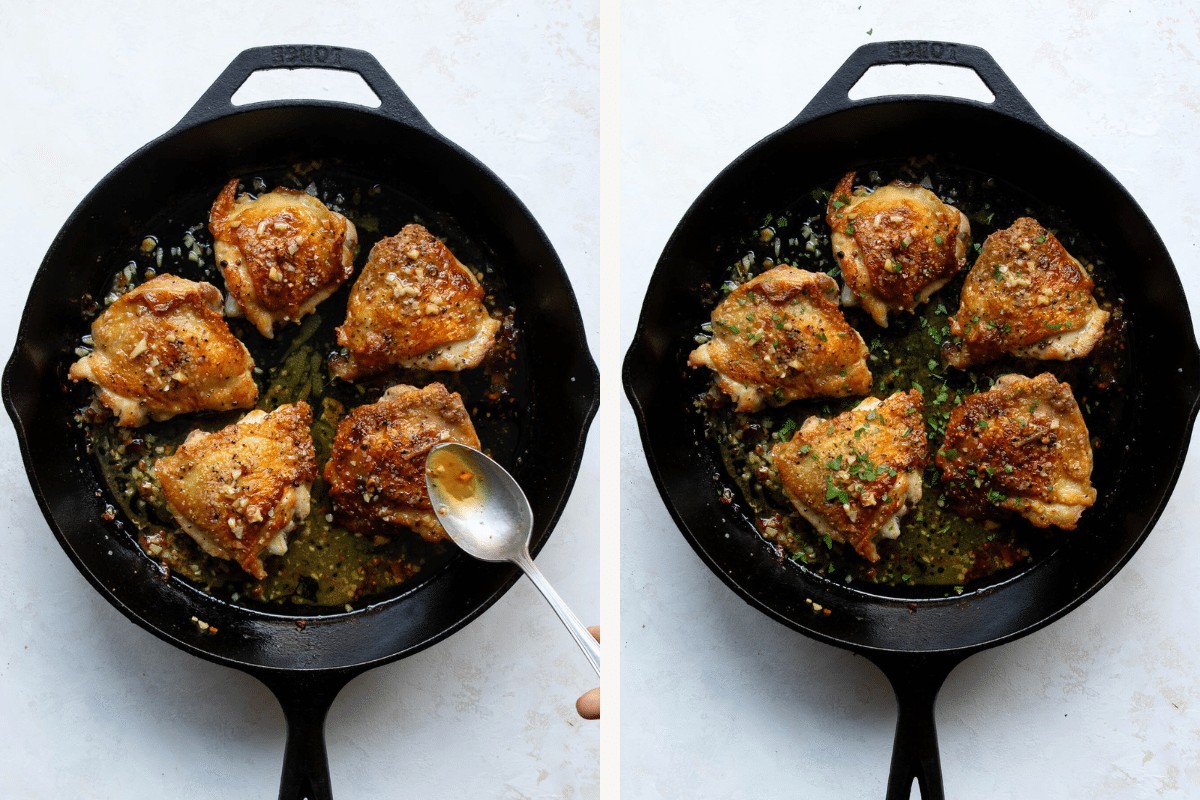
3. Bake and finish: Transfer the whole skillet to the oven and bake for 30 minutes, or until a meat thermometer reads 165°F at the thickest part. If the skin starts getting too dark, loosely tent with foil. When it comes out, spoon all that garlic butter sauce over each thigh. Don’t skip this! Let them rest for 5 minutes before serving, then finish with fresh parsley and dig in!
How Long to Bake Chicken Thighs
Baking time depends on whether you’re using bone-in or boneless thighs, so I always keep this in mind before I start cooking. Here’s a quick guide I go back to all the time:
| Cut | Oven Temp | Bake Time |
|---|---|---|
| Bone-in, skin-on | 400°F | 30–35 min |
| Boneless, skinless | 400°F | 20–25 min |
Olivia’s Best Recipe Tips
Spoon out the excess fat. Bone-in, skin-on thighs release a lot of fat as they sear. If there’s too much fat pooling in the pan, spoon some out before adding the butter and garlic. Too much fat in the pan means the skin fries instead of crisps and it can also cause the garlic to burn faster.
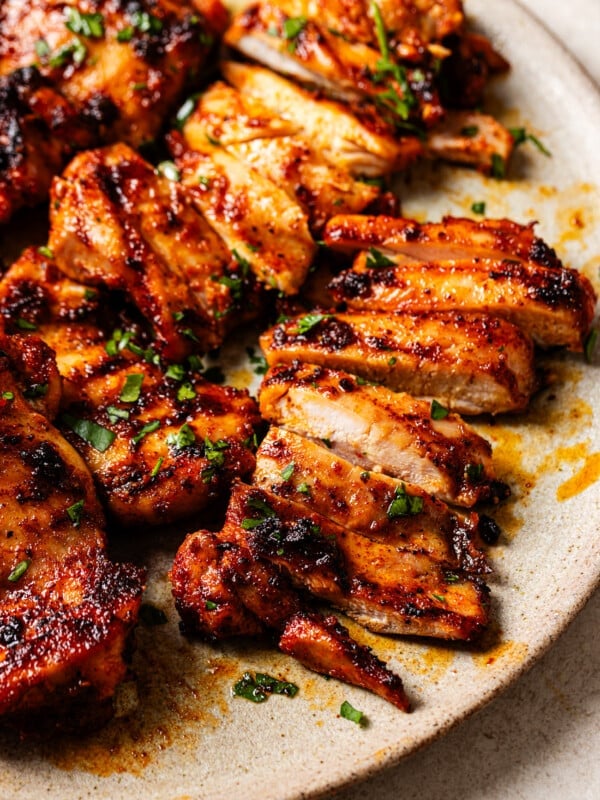
Let the chicken rest before serving. This is a step a lot of people skip because dinner is ready and everyone is hungry. I get it! But even just 5 minutes of resting makes a real difference. It lets the juices settle back into the meat so every bite is tender and juicy instead of dry.
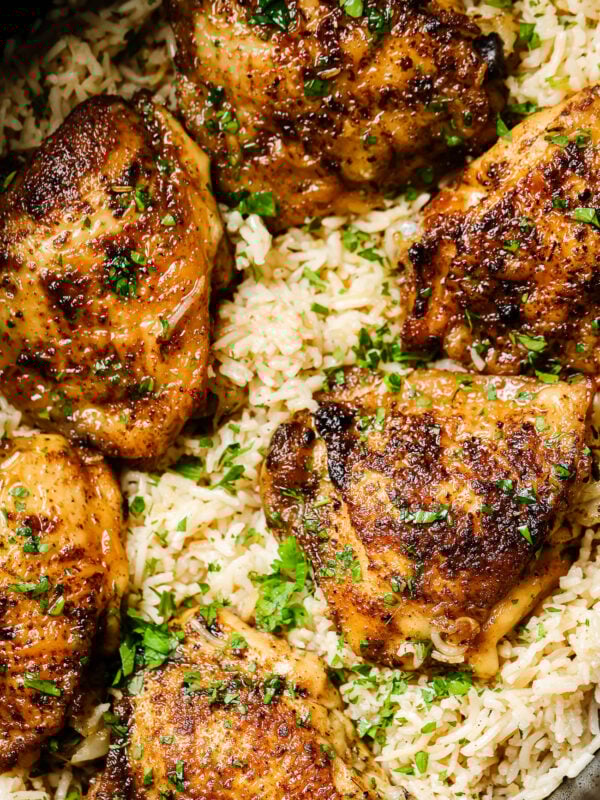
Note: If I have leftover chicken thighs, my next move is almost always my baked chicken thighs and rice. The thighs go straight into the baking dish with the rice and it’s one of Pierre and Thomas’s favourite dinners.
More Chicken Thigh Recipes
Grilled Chicken Thighs
35 mins
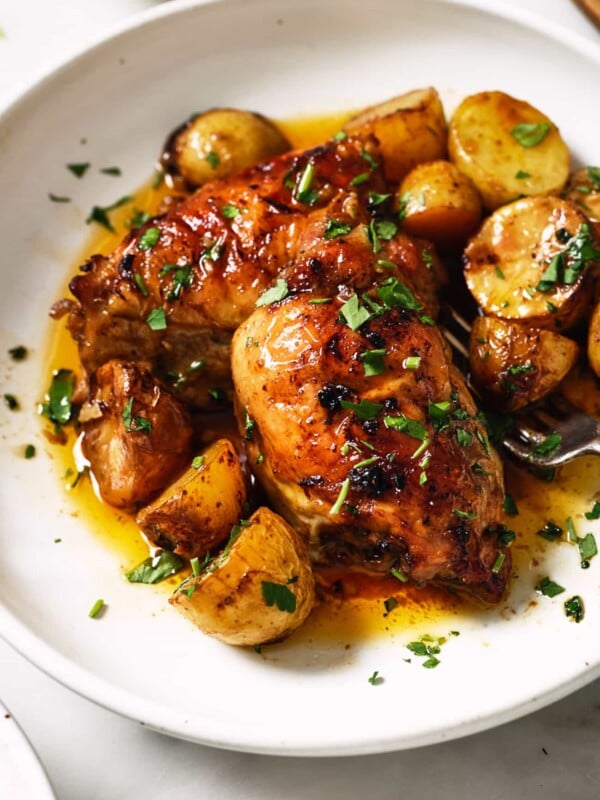
Chicken Thighs with Potatoes
1 hr 10 mins

Baked Chicken Thighs and Rice
1 hr 30 mins
Slow Cooker Chicken Thighs
4 hrs 10 mins
Baked Chicken Thighs (Garlic Butter, Crispy & Juicy)
Video
Ingredients
Instructions
- Preheat your oven to 400F degrees. Move oven rack to center. Pat chicken thighs dry with paper towel and season all over with salt and black pepper.

- Heat olive oil in a cast iron skillet (10-inch) over medium heat. Place the chicken thighs skin-side down and sear until the skin is golden and crispy. It takes about 5 minutes to cook them through at this point. Flip your chicken over once the skin is crispy. If your chicken thighs releases a lot of fat, dispose it using a spoon.

- Place butter in the same skillet. When the butter melts, add minced garlic. Stir the garlic around the pan for 30 seconds.
- Place the whole skillet in the oven and bake for 30 mins for until chicken gets the internal temperature at 165°F. When the chicken is cooked, spoon some of the garlic butter sauce over the top of each chicken thigh. Top with parsley before serving.

Notes
Nutrition
Nutrition information is automatically calculated, so should only be used as an approximation.
Did You Make This?
Follow @primaverakitchen on Instagram, snap a photo, and tag it #primaverakitchen. We’d love to see your recreation.


This looks so good! Does this marinade work on other kinds of meat?
Oh yes. It works really good with chicken breast, steak and salmon too.
Thanks for sharing! Does it keep long?
Yes it will be good in the fridge for 2 to 3 days.
Will this work equally well with boneless, skinless chicken?
Yes it will work. But before adding the chicken in the skillet pour 1 tbsp of olive oil to have to cook the chicken. If you have skin on you don’t need to add olive oil.
I love this chicken recipe, the marinate is very flavorful!
Thank you. Yes the butter sauce is amazing!
Crispiest and juiciest chicken ever. So tasty!
Absolutely! The skin is so so crispy and delicious!
I used a ceramic coated cast iron pan,and the skin really stuck. Would use nonstick next time.
Did you add olive oil before adding the chicken in the skillet? Yes you can use nonstick skillet too.
It looks delicious!!!
It was very good!!
Your recipe calls for oil, but the directions to tell where to use it. Should the oil be used for searing the chicken?
Sorry about that. Yes it should be used for searing the chicken. Just fixed it on the recipe box to avoid further confusion. Thanks!
Just made this and it came out AMAZING. I added some extra crushed whole garlic gloves before sticking it in the oven. This will definitely be in my weekly rotation! Thank you for sharing this awesome recipe.
That’s amazing! So happy you enjoyed this recipe 😉
Made this for my wife and I and it came out wonderful. Super juicy and tender. 10/10 would do again.
That’s amazing. So happy to hear that 😉
I usually never comment on the recipes I try. But this was delicious! And so easy.
That’s awesome! So happy to hear that 😉
Do you HAVE to use a cast iron pan? I dont have one but would like to make this dish.
No you can use a nonstick skillet too.
The recipe calls for oil, but the directions don’t say where to use it. Should it be used when searing the chicken?
Sorry about that. We fixed it on the recipe box to avoid further confusion. Thanks for pointing it out 😉
Hi! I want to make this recipe but don’t have any type of skillet. Is there something else I can use?
You can use any type of pot or pan that goes safely in the oven.
The skin never really got dark and crispy, but it did stick to the bottom of the pan. Just stuck it in the oven so hopefully it will come out ok. What is the trick to crispy skin that doesn’t stick to the pan? I used about 3T olive oil in the cast-iron pan, bc I used 6 thighs. Thanks.
I think your heat was very high. Try to cook the chicken over medium high and don’t let it cook for more than 5 minutes.
Hi Jennifer
The secret to cooking with cast iron is “low and slow.” I start mine on medium and then turn it closer to low. Don’t touch the chicken until your time is up. When meat is at the right temperature, it should be easy to flip. I cook almost exclusively with cast iron when it comes to supper dishes or biscuits.
Can you use an air fryer?
I believe so, but I’m not sure since I haven’t cooked this recipe in an air fryer.
My husband and I loved it. Thanks
You’re so welcome!
Amazing!! Thank you!
Happy you liked it!
Made this tonight, but switched it up and added some spices. Also used a non-stick skillet and cooked entirely on the stove because I wasn’t sure if my pan could go in the oven. That said, this turned out yummy, but not super crispy. I imagine this is because it wasn’t in the oven? But the chicken thighs also release so much fat – are we supposed to dispose of that or let the chicken cook in it’s own fat? Considering the recipe also calls for so much butter so I’m just unclear on that point. Thanks.
Yes the chicken gets crispier if you use the oven. And yes if your chicken releases lots of fat, you should dispose the extra fat before adding butter.
Thank you so much for replying! Cooking is still new to me so I feel my questions are very basic, but it’s great to find good recipes and someone willing to share their knowledge and help 🙂
You’re very welcome 😉
Hello
Just a funny..
Okay, if it serves 5 as stated — does the fifth person just sit and watch the other four people eat, assuming it’s one thigh per person.
Sorry, it was a typo. It’s 5 chicken thighs for 5 people. One thigh per person.
Made this the other night ~ everyone loved it!
Thank you!
Happy you like and your family enjoyed this recipe!
It so yummy.
thank you!
I tried your recipe. It was easy to make and quick to sear the chicken. I added some scallions and fresh mushrooms to the garlic butter. Served it with some flavored rice. Will keep this recipe for now on.
That’s great. Happy to hear that.
Can I move the ingredients from the skillet into a deep baking dish to go into the oven?
Yes you can!
Great thanks! Trying this today for valentines day! ♥️
Awesome. You will love it!
I made this last night, my boyfriend loved it! So flavorful and so easy to make! Will definitely be making again
Amazing!!