
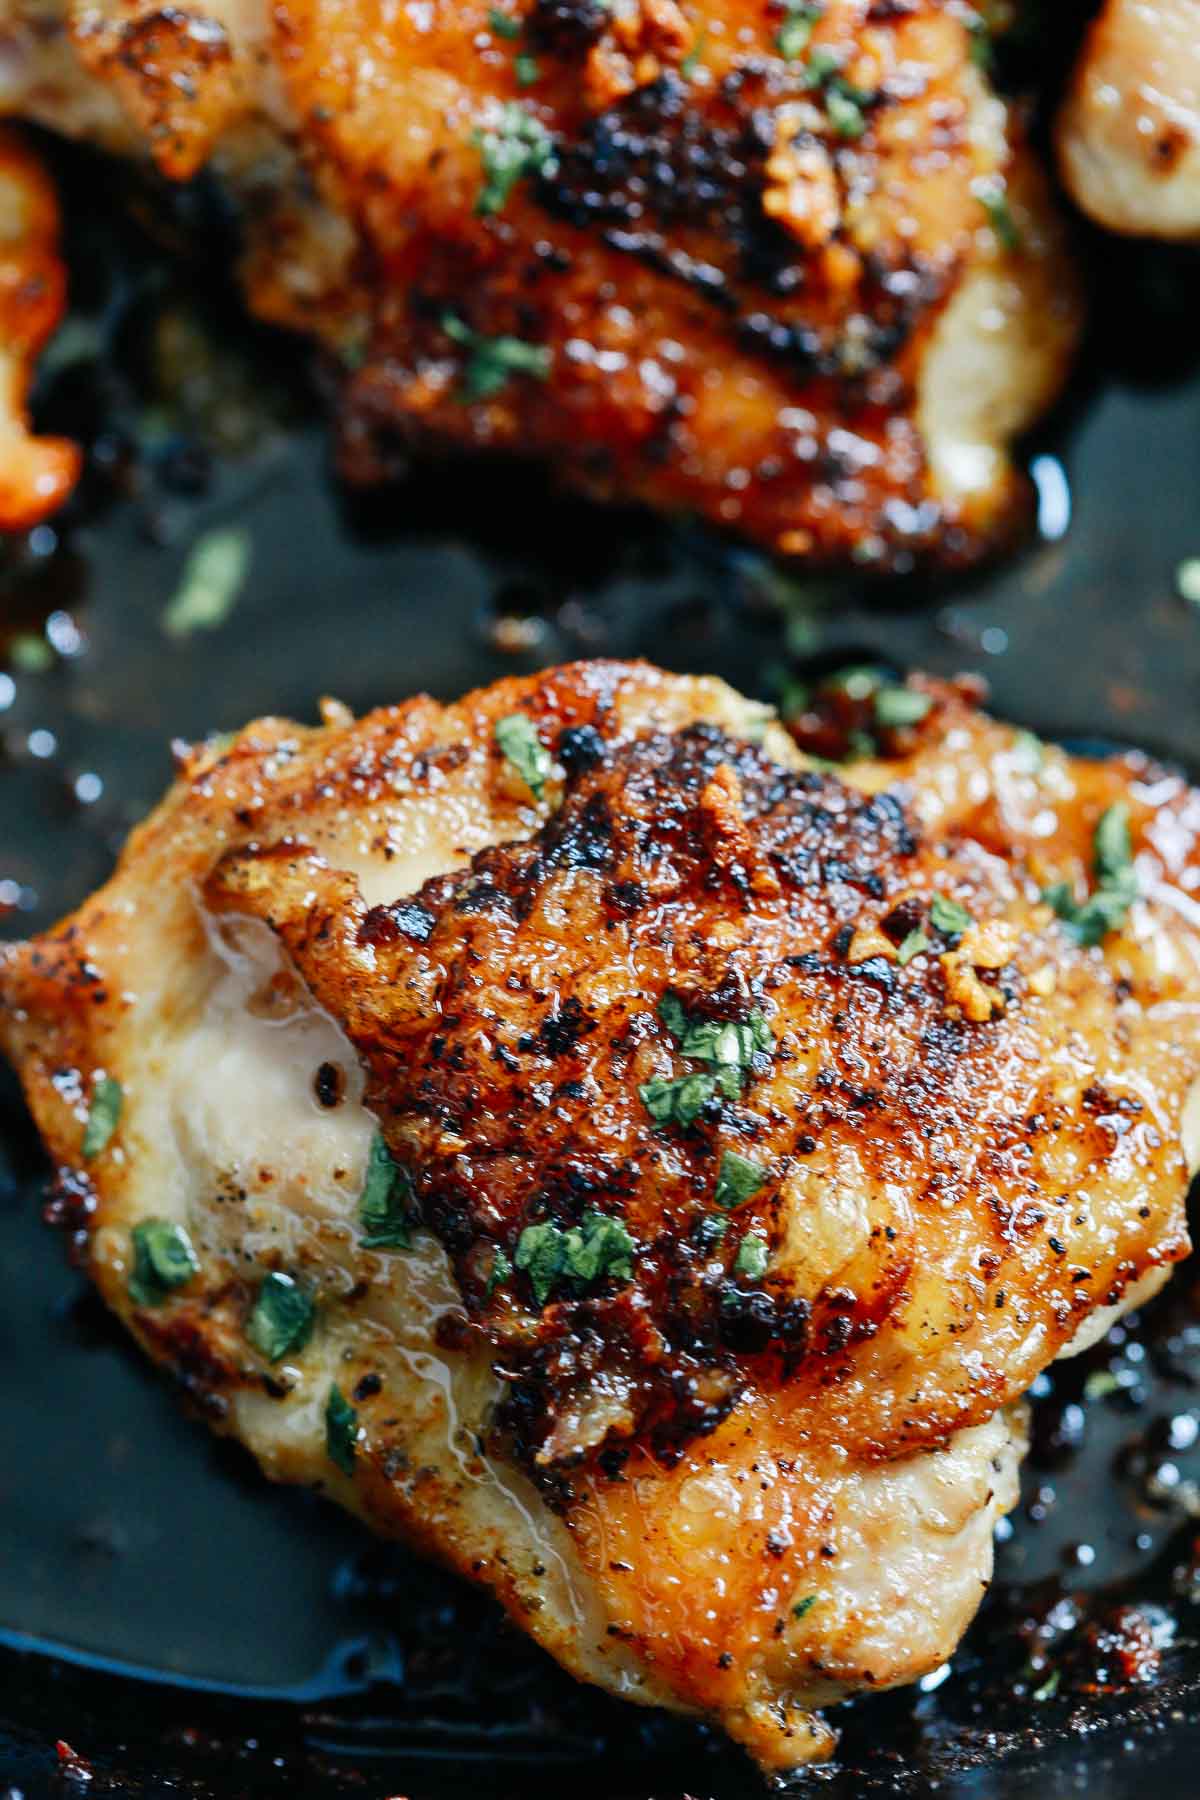
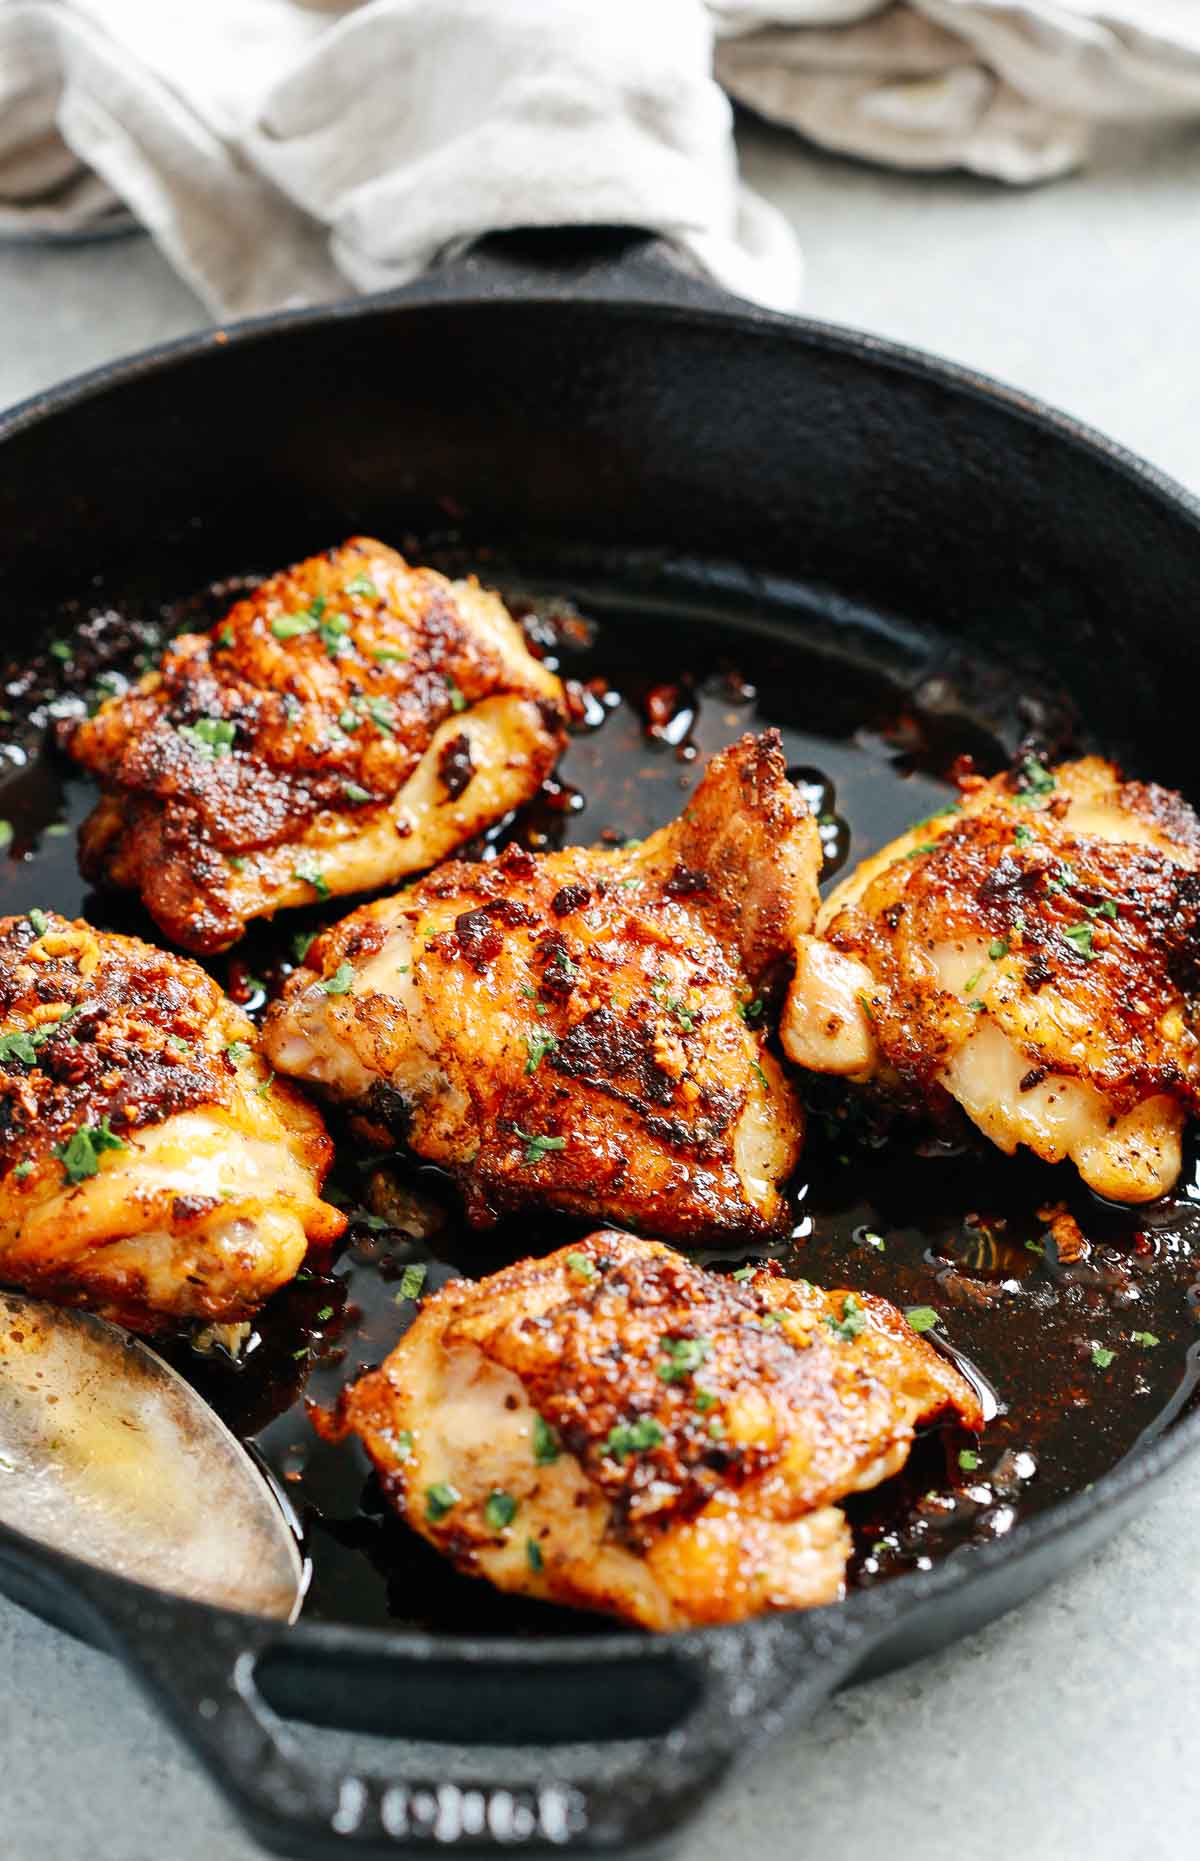
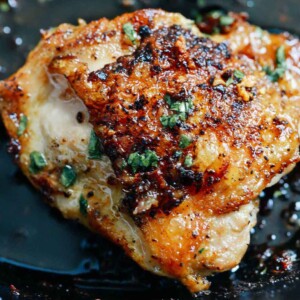
These baked chicken thighs have been a staple in my house for years and for good reason. Bone-in, skin-on thighs go into a cast iron skillet with garlic butter, then straight into the oven for 30 minutes. The result is incredibly crispy skin with juicy, tender meat underneath. You only need a handful of ingredients and 45 minutes to get dinner on the table.

The Chicken Thigh Recipe My Family Fights Over
I’ve been developing chicken recipes for busy families for over 10 years on Primavera Kitchen, and I can tell you with confidence that bone-in, skin-on chicken thighs are one of the most forgiving and flavourful cuts you can cook.
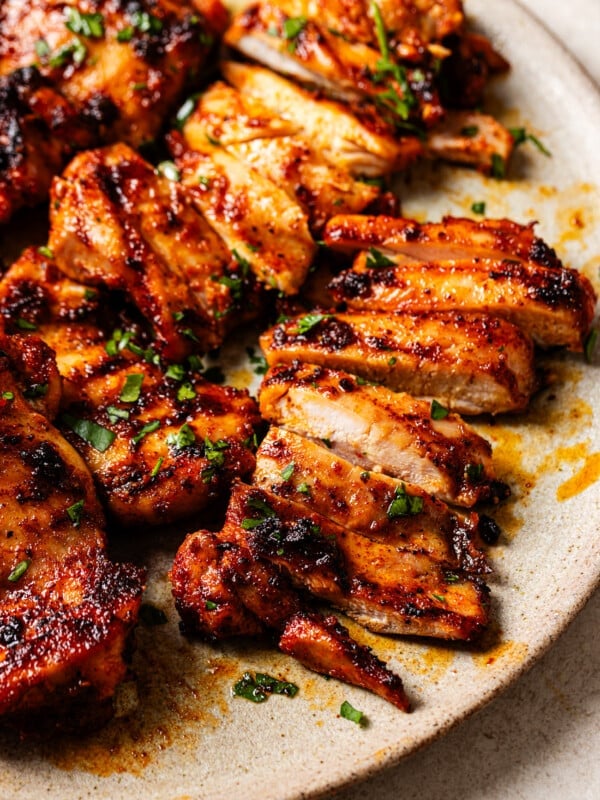
They stay juicy even if you leave them in the oven a few minutes longer, something you simply can’t say about chicken breast. I’ve made this garlic butter version more times than I can count, and it never fails.
The key is the sear-then-bake method. I always start the chicken skin side down in a hot skillet before finishing it in the oven. This is what gives you that deeply golden, crispy skin that Pierre and Thomas absolutely fight over at the dinner table. The garlic butter sauce does the rest, keeping every single bite incredibly juicy and tender.
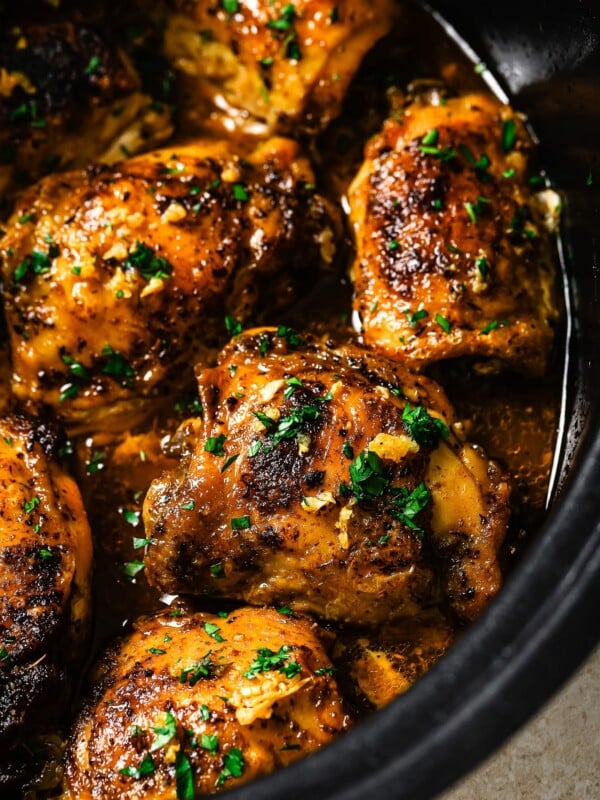
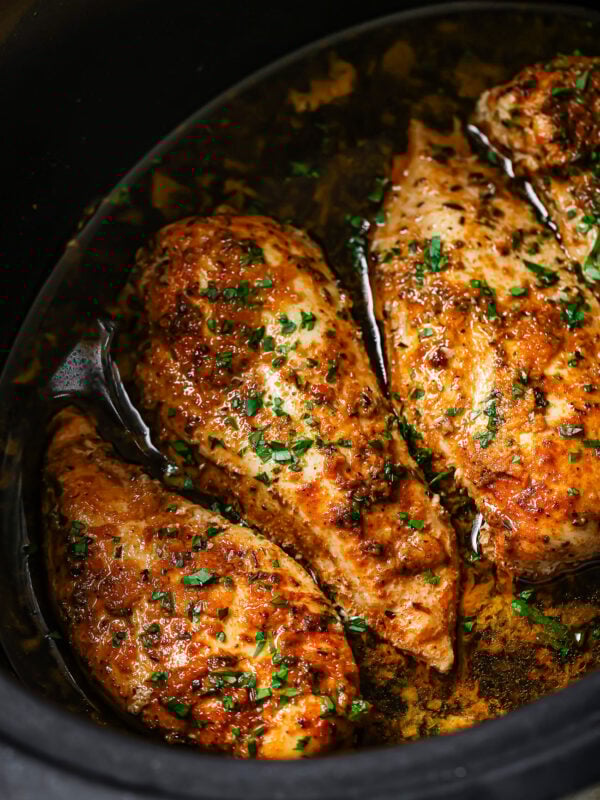
If you love cooking chicken thighs as much as I do, my Slow Cooker Chicken Thighs are just as easy and perfect for those days when you want dinner to cook itself. And if you’re more of a chicken breast person, my Garlic Butter Baked Chicken Breast uses the same flavour profile and is one of the most popular recipes on Primavera Kitchen.
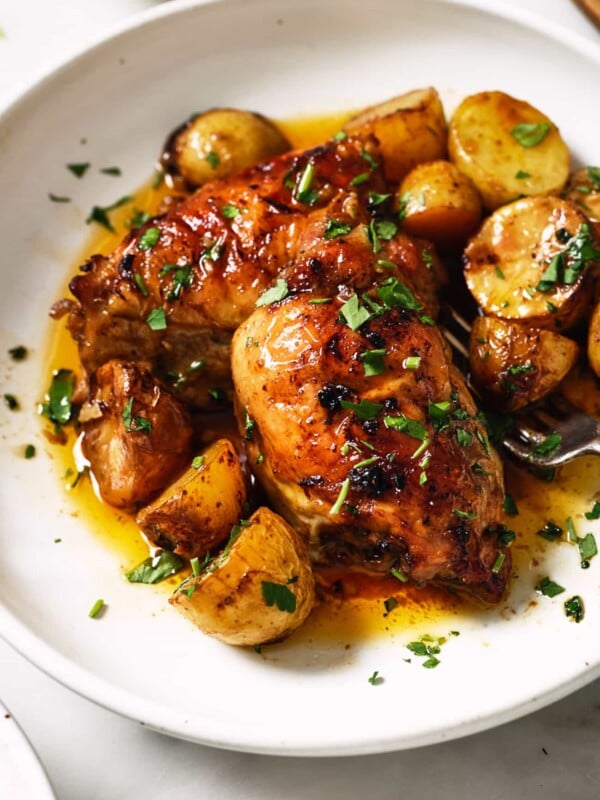
For sides, I always serve this with my Creamy Mashed Potatoes cause they soak up that garlic butter sauce perfectly and my Parmesan Green Beans to round out the plate.
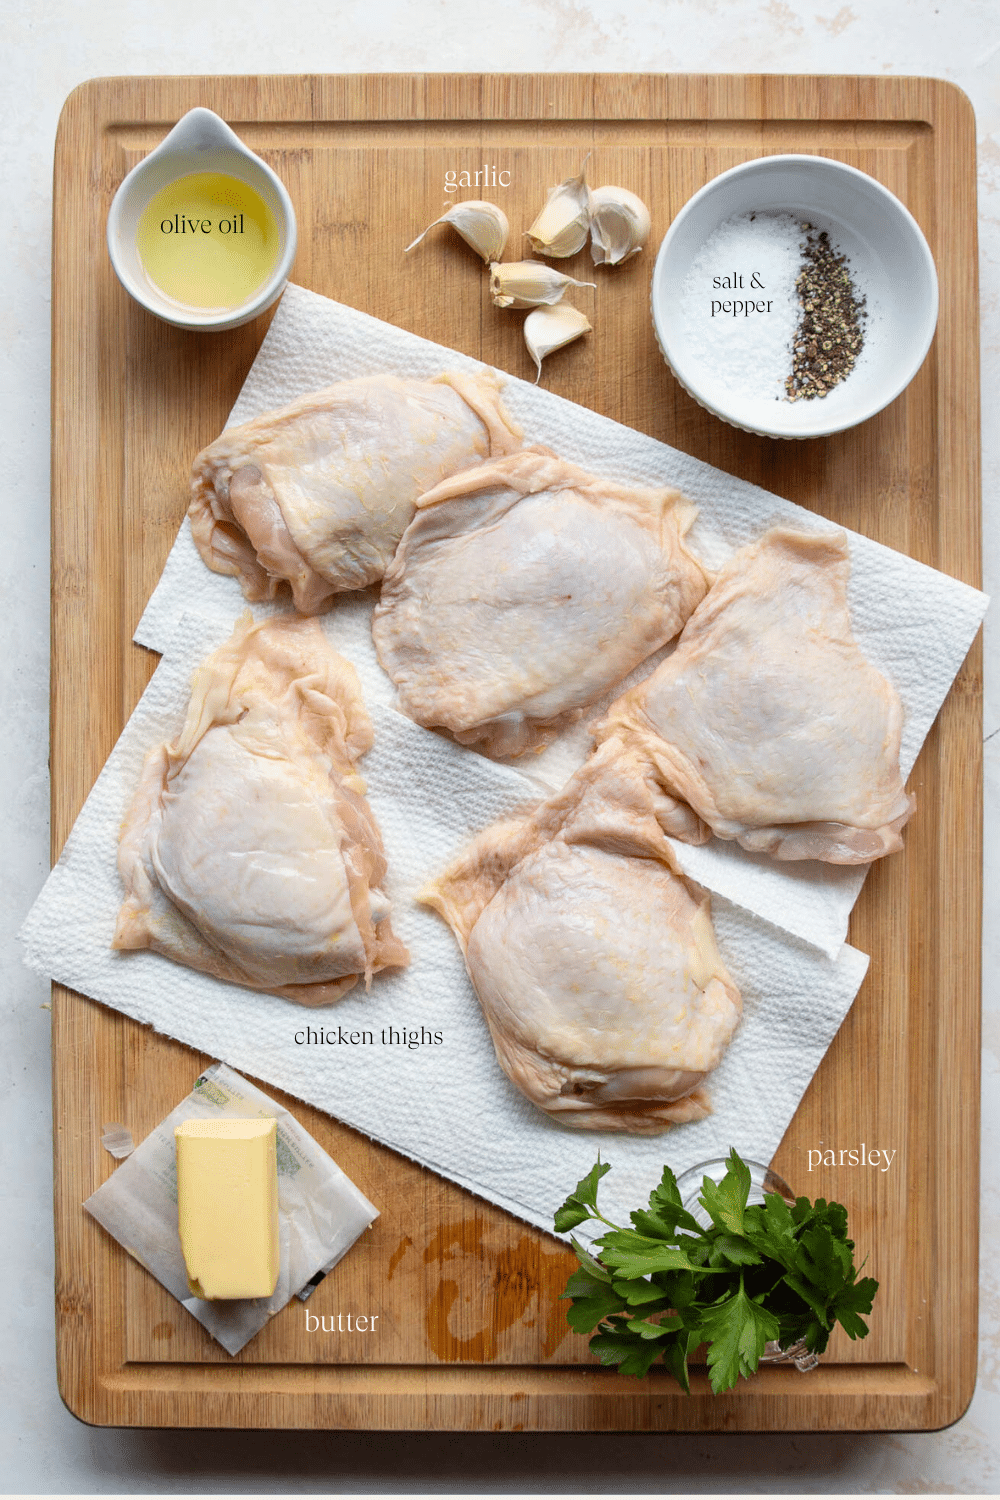
Chicken Thighs – I use bone-in, skin-on chicken thighs to get a crispy outside while keeping the inside moist and tender. Of course, if you only have boneless skinless chicken thighs or chicken breasts, you can use those too. Just remember to reduce the baking time to 20–25 minutes. However, after making this recipe many times, I’ve found that keeping the skin and bone in makes the chicken much juicier and more flavorful.
Garlic – I like to use freshly crushed cloves because they have a stronger, more vibrant flavor and aroma compared to store-bought pre-minced garlic. Store-bought garlic usually comes as a paste or finely minced, which means it burns much faster in the pan and can turn bitter before the chicken is done.
Butter – I prefer unsalted butter because it lets me control the salt level and lets the natural flavors of the other ingredients shine.
Olive Oil – I use a small amount of olive oil to sear the chicken before baking. It helps the skin get golden and crispy without burning.
Salt and Black Pepper – Simple seasoning makes a big difference here. I season both sides of the chicken thighs generously before they hit the pan — it’s the foundation of all the flavor.
How to Make Baked Chicken Thighs
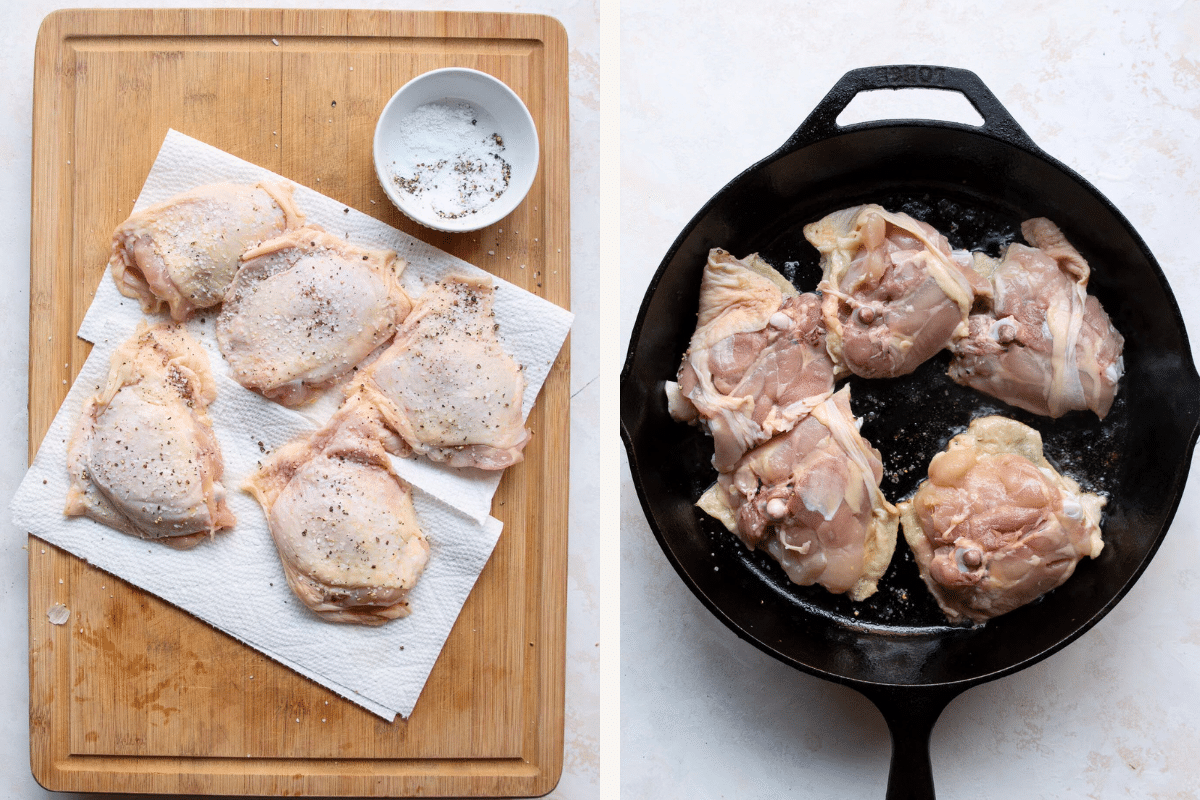
1. Season the chicken: Preheat your oven to 400°F and move the rack to the center. Now, before you do anything else, pat your chicken thighs completely dry with paper towels. I know it sounds like a small thing, but trust me on this one! Any moisture left on the skin will turn into steam in the oven and you’ll end up with soft, pale skin instead of that gorgeous golden crispy skin we’re going for. Once they’re dry, season both sides generously with salt and black pepper. Don’t be shy with the seasoning! This is where all the flavor starts!
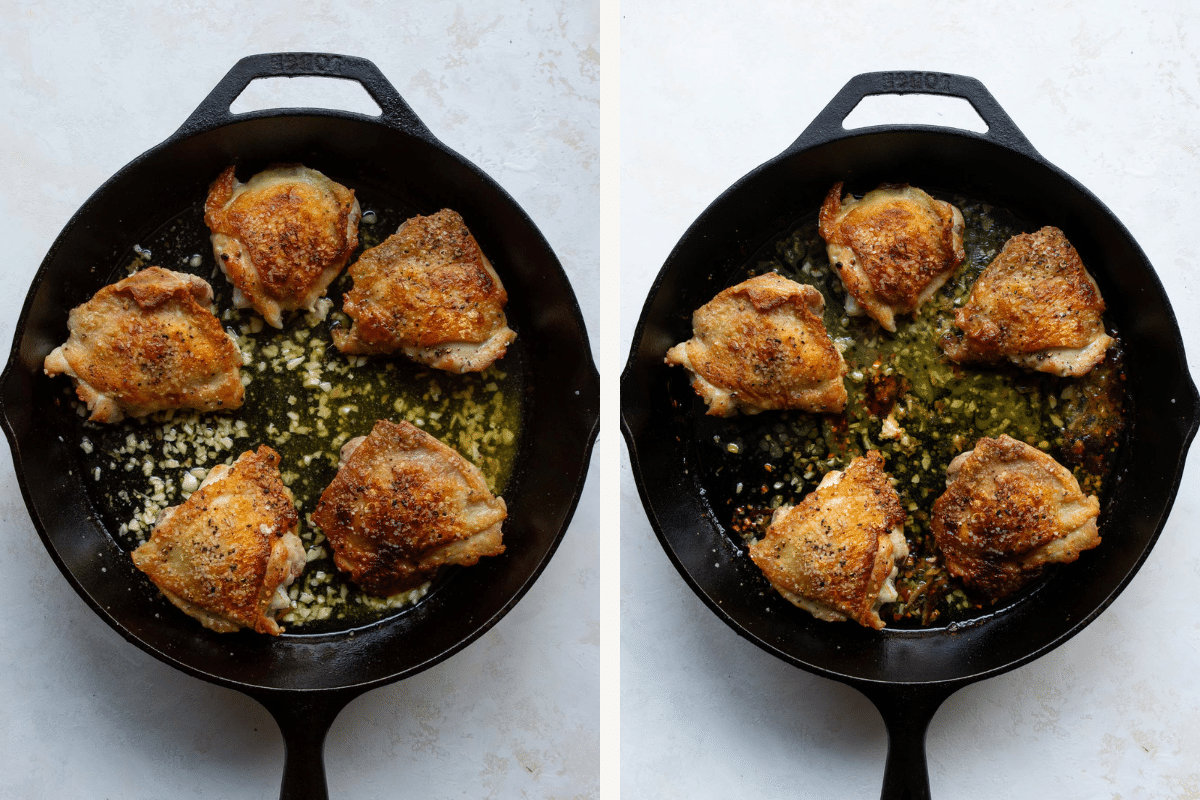
2. Sear the skin: Heat your olive oil in a 10-inch cast iron skillet over medium-high heat. Place the chicken thighs skin-side down and leave them alone for about 5 minutes, no moving them around! My cast iron skillet is my best friend for this because it goes straight from the stovetop to the oven, which means less mess. Once golden, flip the thighs over, push them to one side, melt the butter, add the crushed garlic and stir for 30 seconds. Keep the heat at medium here, fresh garlic burns fast and turns bitter!
No cast iron skillet? No worries! Sear in any regular skillet, then transfer to a baking dish to finish in the oven and pour the garlic butter sauce over the top.
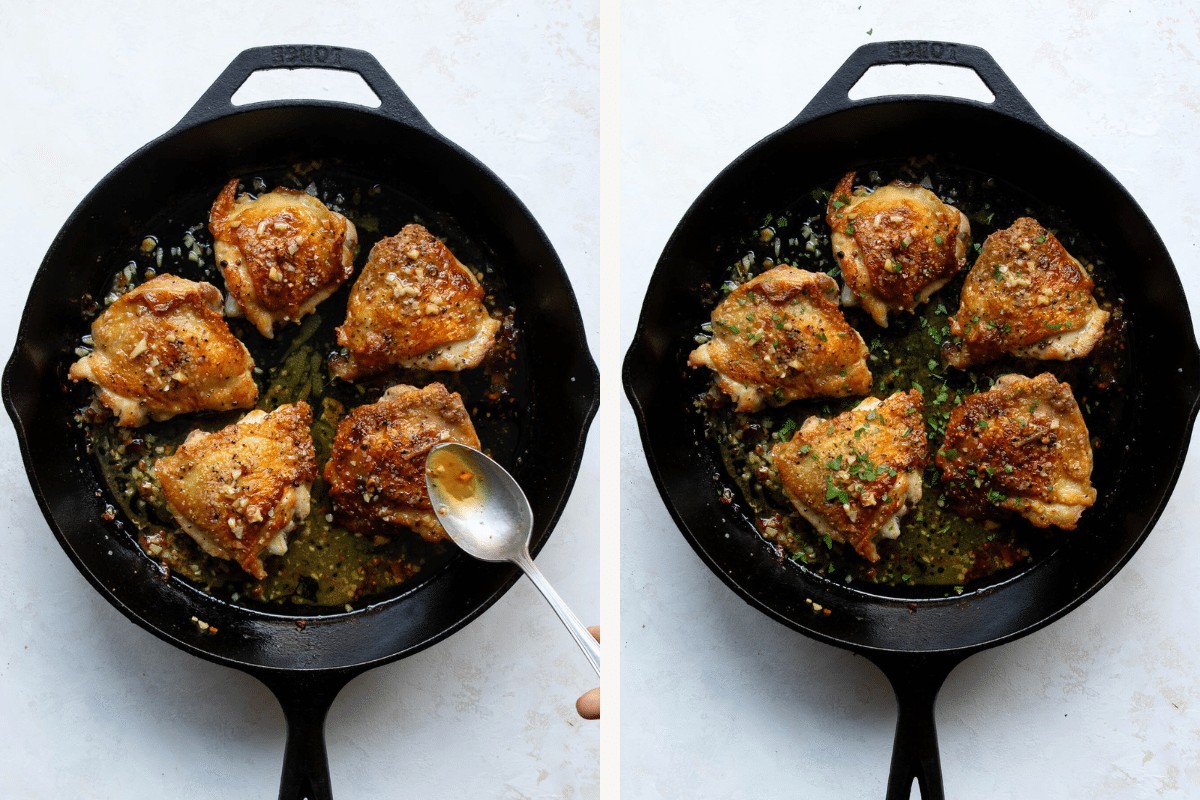
3. Bake and finish: Transfer the whole skillet to the oven and bake for 30 minutes, or until a meat thermometer reads 165°F at the thickest part. If the skin starts getting too dark, loosely tent with foil. When it comes out, spoon all that garlic butter sauce over each thigh. Don’t skip this! Let them rest for 5 minutes before serving, then finish with fresh parsley and dig in!
How Long to Bake Chicken Thighs
Baking time depends on whether you’re using bone-in or boneless thighs, so I always keep this in mind before I start cooking. Here’s a quick guide I go back to all the time:
| Cut | Oven Temp | Bake Time |
|---|---|---|
| Bone-in, skin-on | 400°F | 30–35 min |
| Boneless, skinless | 400°F | 20–25 min |
Olivia’s Best Recipe Tips
Spoon out the excess fat. Bone-in, skin-on thighs release a lot of fat as they sear. If there’s too much fat pooling in the pan, spoon some out before adding the butter and garlic. Too much fat in the pan means the skin fries instead of crisps and it can also cause the garlic to burn faster.
Let the chicken rest before serving. This is a step a lot of people skip because dinner is ready and everyone is hungry. I get it! But even just 5 minutes of resting makes a real difference. It lets the juices settle back into the meat so every bite is tender and juicy instead of dry.
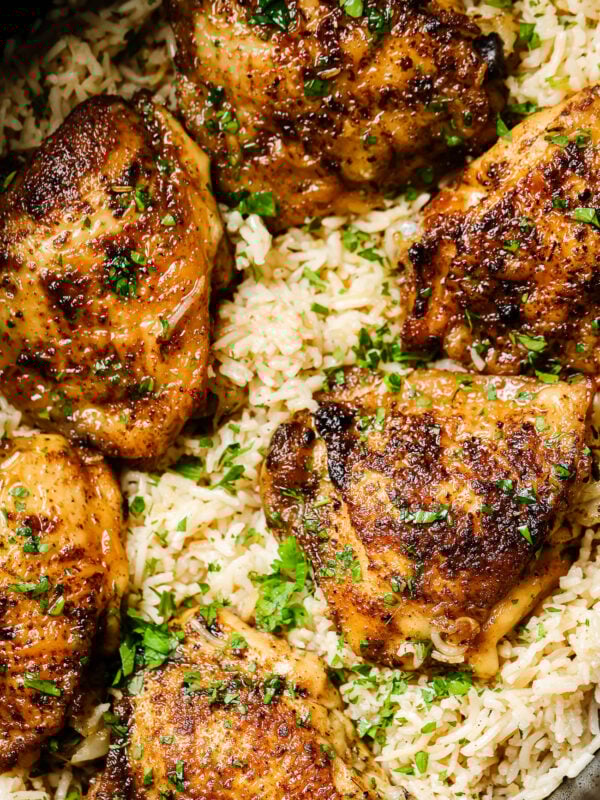
Note: If I have leftover chicken thighs, my next move is almost always my baked chicken thighs and rice. The thighs go straight into the baking dish with the rice and it’s one of Pierre and Thomas’s favourite dinners.
More Chicken Thigh Recipes
Grilled Chicken Thighs
35 mins
Chicken Thighs with Potatoes
1 hr 10 mins

Baked Chicken Thighs and Rice
1 hr 30 mins
Slow Cooker Chicken Thighs
4 hrs 10 mins
Baked Chicken Thighs (Garlic Butter, Crispy & Juicy)
Video
Ingredients
Instructions
- Preheat your oven to 400F degrees. Move oven rack to center. Pat chicken thighs dry with paper towel and season all over with salt and black pepper.

- Heat olive oil in a cast iron skillet (10-inch) over medium heat. Place the chicken thighs skin-side down and sear until the skin is golden and crispy. It takes about 5 minutes to cook them through at this point. Flip your chicken over once the skin is crispy. If your chicken thighs releases a lot of fat, dispose it using a spoon.

- Place butter in the same skillet. When the butter melts, add minced garlic. Stir the garlic around the pan for 30 seconds.
- Place the whole skillet in the oven and bake for 30 mins for until chicken gets the internal temperature at 165°F. When the chicken is cooked, spoon some of the garlic butter sauce over the top of each chicken thigh. Top with parsley before serving.

Notes
Nutrition
Nutrition information is automatically calculated, so should only be used as an approximation.
Did You Make This?
Follow @primaverakitchen on Instagram, snap a photo, and tag it #primaverakitchen. We’d love to see your recreation.


Amazing how such a simple recipe can be so good. I cooked just 2 thighs so cut back to 3 cloves of garlic but kept the butte the same since I added a russet potatoe cut into 1/8. They absorbed the butter in the oven and the while dish was yummy good.
Right? Totally agree with you.
I stopped reading after I don’t wash my chicken… Bleach your sink… Wash your chicken with limes or lemons and apple cider vinegar… You should do that with all meat as you have no Idea how many times it has been dropped on the floor or if the people handling it have properly clean their gloves or hands… And remember … You just can’t eat everyone’s food lol
This is a joke right?? You know citrus and vinegar aren’t disinfectants right?? “Washing” meat is wholly unnecessary if you cook it correctly and it leads to more germs getting splashed around your kitchen.
The National Institutes of Health, as far back as 1998 and as recently as 2019, reference studies on the bactericidal properties of vinegar (5%). In particular, it is effective, particularly when combined with salt, against ecoli, salmonella, and listeria. A 2005 study found apple cider vinegar with lemon juice to be very effective against salmonella. It’s easy to find citations by googling for NIH vinegar ecoli or salmonella.
Also, some cultures require poultry be thoroughly washed before cooking and consumption.
I wipe down my sink area and utensils with a bleach solution after carefully handling raw poultry so I don’t worry about splashes of contaminated fluids.
You do realize that cooking the chicken not only kills the bacteria you think you are “washing off” but also would kills any bacteria that could potentially be on the chicken from being dropped or touched by inflicted hands? That’s what cooking to 165 does.
You do not have to wash your chicken. That’s a damn myth, I wish people who have no idea what they’re talking about would stop commenting. Your kitchen is probably filled with salmonella that has sprayed up from you “washing” your chicken.
What a joke!
That’s what cooking it is for???
I have made this soooo many times.! With chicken thighs being on sale often, this is definitely one of my go-to recipes. I spoon some of the garlic butter over the skin before it goes in the oven. About 3 minutes before finishing, I turn the broiler on to give it a super crispness. My family loves this. Usually serve it with mashed potatoes and broccoli or spinach. Simple and delicious 😋
Glad to hear that.
I’ve baked chicken thighs using several recipes from the internet over the past few months. They were good but not great. Nothing I’d give up space for in my recipe box.
I tried your garlic butter chicken thighs recipe tonight and it was very simple, very basic and tasted wonderfully! Crunchy, savory skin, and moist. It’s earned space in the recipe box. 🤗
Aww that’s awesome. So happy to hear that.
Wonderful!!!!
Thank you!
Now what to cook as a side dish 🤔
Quinoa salad, rice, pasta, green beans and mashed potatoes.
have made this twice, first time followed the recipe, second time, added more spices that I enjoy..the hubby & I loved both.
That’s awesome. Happy you and your husband liked this recipe!
Delicious! I’ve made this dish several times just as it is described, and it has been great every time. My nine year old picky eater absolutely loves this chicken!
Awww I’m so happy to hear that your child loves this recipe. It makes me so happy. Thank you for your comment.
The most elegant food truly is the most simply. I’ve made this weekly for the last month. It never disappoints. Thank you!
So awesome to hear that. Thanks for stopping by and for your feedback.
Loved this! Made this tonight, skin was crispy and the chicken was SOOO moist! Will definitely make again, and maybe play with more seasonings for variety <3
Yes you can totally try different kind of seasonings for sure.
my fav. recipe for chicken thighs, so good and crispy, made this twice before, making again tonight, I add more spices to it, tonight will be adding potatoes to the skillet, great recipe..
So glad you enjoy this recipe! And yes it is great with potatoes.
After I wash my hands after handing raw chicken, I pour a little apple cider vinegar on my hands, it gets rid of all the chicken smell. My mother in law taught me this.
Good tip!
Thank you for this recipe, I love it
So glad you enjoyed this recipe!
SO GOOD! I added more garlic because I love it! Also I made the recipe but had only two thighs. I think it would be hard to over season this recipe, so don’t be shy! This will be a go to recipe from now on!
So happy you enjoyed this recipe!
I tried this recipe tonight and it was a huge hit with the family. I loved the crispy skin and juicy insides. I added a little bit of seasoning before popping it in the oven. My family is a big fan. Will definitely make again thanks!
Awww thank you so much for this awesome feed back. We love this recipe too and I make it all the time. Thanks for stopping by!
So easy and now the house smells like heaven. 🙂 Was going to put over rice but then noticed had leftover orecchiette pasta in fridge. Warmed it a minute in microwave then tossed it in with the completed dish to catch all the butter & garlic! YUM!!!
So glad you enjoyed this recipe!
I tried to do this recipe, but unfortunately, the info you provide is wrong. You say to use a cast iron on medium-high heat to sear the chicken. In the next step you melt the butter in the same pan, but on low heat not to burn the butter. If you use a cast iron pan, you do not have a quick response in temperature. If it was on high, it will remain hot and burn your butter even if you turn off the heat source.
Cast iron pans take a bit longer to heat up and cool down compared to other pans, so you won’t get a quick temperature response. However, you can still cook on high heat with cast iron and then reduce the heat to low when adding butter so it won’t burn. Cast iron is a versatile choice for cooking because it heats evenly, but just keep an eye on the temperature and adjust it as needed to avoid burning your food.
I like all these ingredients, but this recipe just doesn’t work. It’s lacking something. Just a rich, garlicky, greasy mess. Super disappointing.
Sorry you feel this way.
Delicious and I never like thighs
Awesome!!!
This was not only delicious and juicy but quick and easy. Passed the recipe to other family members.
Awww that’s awesome! Thanks for sharing it. I appreciate it a lot.
Simple and delish!
Indeed!